
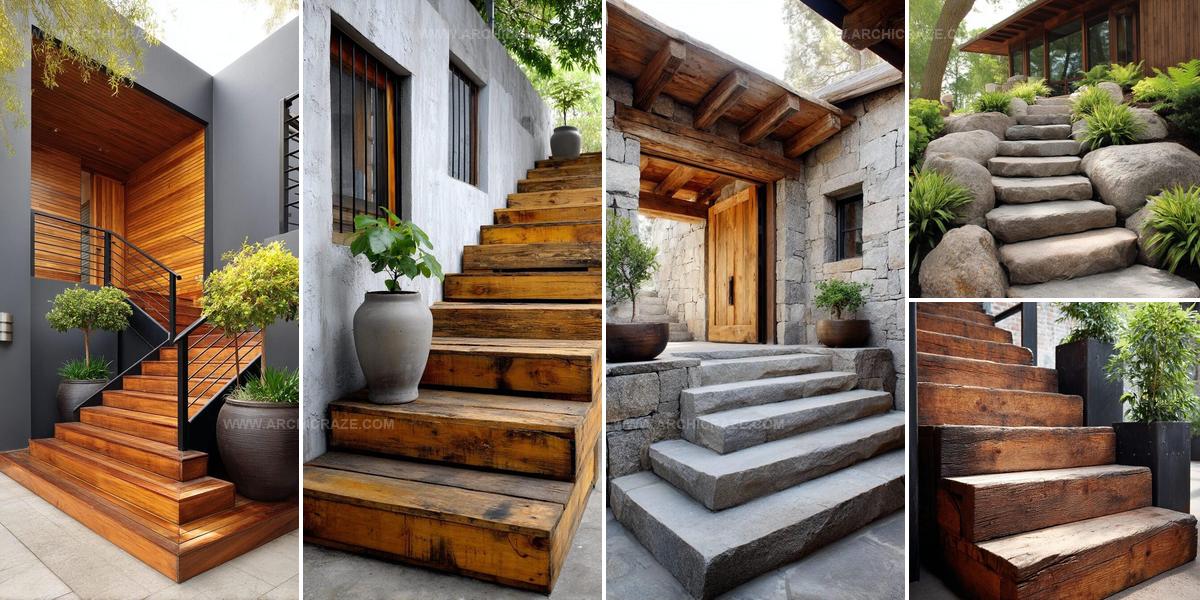
10 DIY Outdoor Stairs Designs That Look Stylish at Home

Building outdoor stairs doesn't have to drain your wallet or require professional contractors when stylish DIY outdoor stairs designs for any home offer accessible solutions that combine function with visual appeal.
Slopes and uneven terrain become opportunities rather than obstacles once you understand how versatile handmade steps can be.
Materials range from reclaimed wood and natural stone to poured concrete and brick, giving homeowners flexibility based on budget and aesthetic preferences.
Safety remains paramount, yet attractive railings and proper dimensions ensure both security and beauty work together seamlessly.
Whether connecting different yard levels or providing porch access, well-constructed steps enhance property value while reflecting personal style.
Different architectural elements like built-in planters or integrated lighting add character that mass-produced options simply cannot match.
With careful planning and attention to detail, you can craft functional pathways that become standout features of outdoor living spaces.
Red Brick Steps With Concrete Foundation
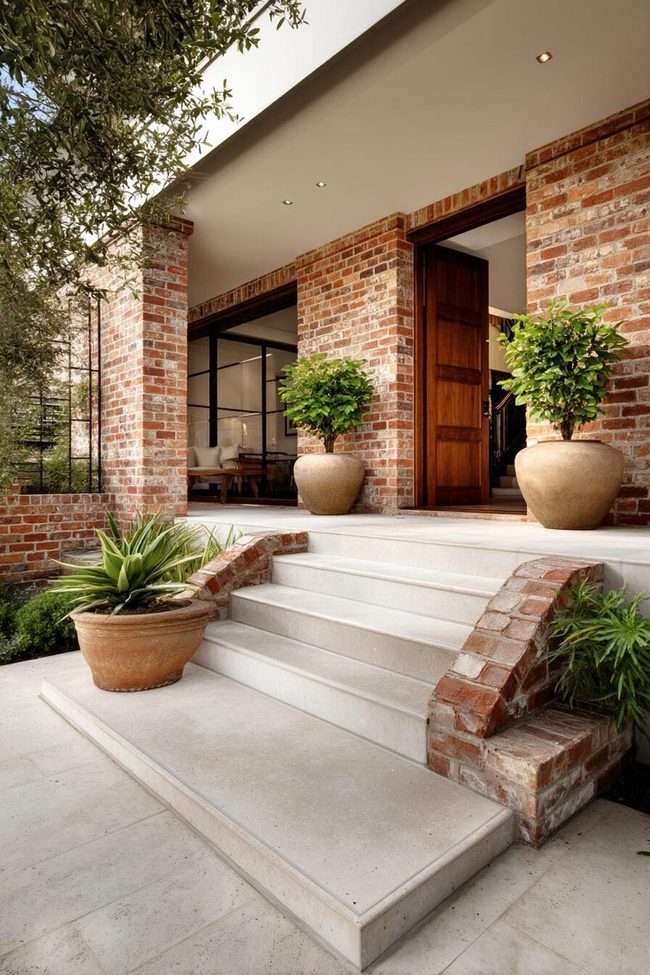
Brick and concrete outdoor stairs showcase a visual richness that few materials can match, with patterns like running bond, basket weave, and herringbone turning step treads into genuine design statements while their weathered surfaces develop character over decades of use.
You can enhance this effect further by experimenting with mortar colors beyond standard gray, buff, tan, or dark charcoal dramatically shift the overall look of your brickwork.
For step edges, bull-nosed bricks or concrete nosing that extends slightly beyond the riser faces add both safety and clear visual definition.
A center brick or concrete balustrade on wider stairways provides adaptable to different needs handholds while boosting the design appeal.
Beyond aesthetics, these stairs demand solid construction starting with a proper footing trench filled with compacted gravel and a poured concrete base to prevent settling.
You can need to plan your steps with a consistent rise of about 7 inches and a comfortable tread depth of at least 11 inches for safe navigation, and incorporate a slight slope (about 1/8 inch per foot) away from adjacent structures for water drainage.
I recommend these stairs especially for colonial, federal, or traditional home landscapes where architectural formality shapes the entire outdoor space.
You can display seasonal container gardens on the steps to add color and life to the hardscape, and construction typically ranges from $700–1500 depending on design complexity and material quality.
Wooden Steps Suspended Above Earth
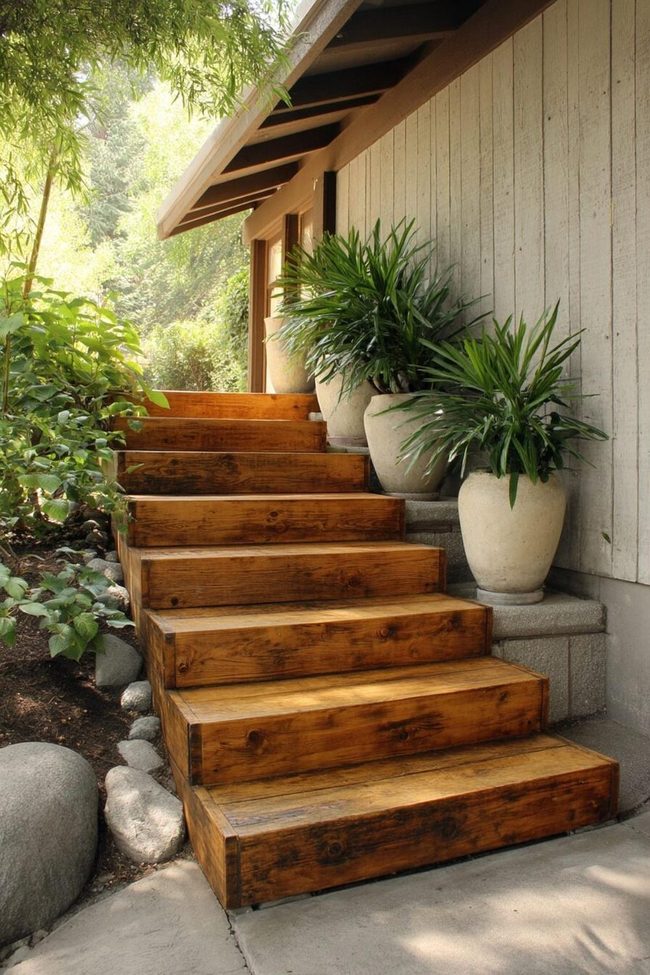
Wooden platforms that seem to suspend in mid-air and defy gravity instantly grab your attention and transform any landscape into something out of the ordinary.
Metal brackets hidden beneath the surface do the heavy lifting while pressure-treated lumber sits on top, and this combination makes the steps appear weightless from most angles.
You could want thick hardwood like ipe or cedar that can stand up to rain, sun, and constant foot traffic without rotting or warping.
Installation means anchoring those metal brackets deep into concrete footings so they stay put for years, and a spirit level keeps every platform perfectly flat for safety and good looks.
Space your wooden steps at comfortable intervals so walking through feels natural and smooth, almost like floating across your garden yourself.
We recommend sealing the wood annually with weather-resistant coating to keep moisture and UV rays from breaking down the material over time.
River rocks or decorative gravel scattered below and around the bases prevent soil erosion while adding another layer of design appeal to the whole installation.
Contemporary yards with clean lines and modern architectural features benefit most from this style, and even small spaces feel less cramped since the design feels light rather than heavy.
Most people spend between $400-800 on a floating stair project depending on wood quality and how many steps you need to build.
Industrial Metal Frames With Wooden Treads
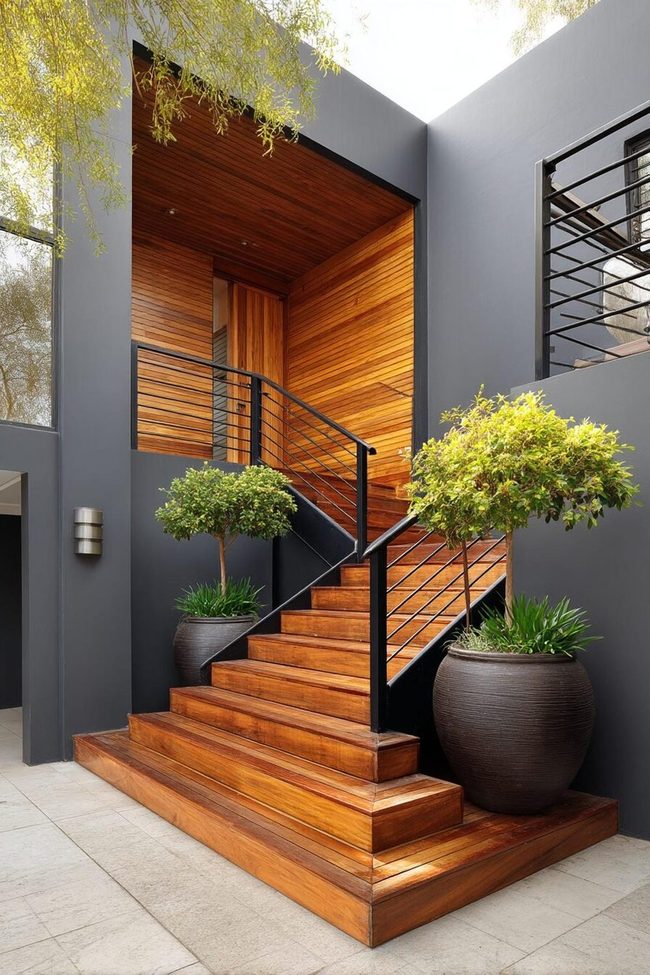
Metal stringers paired with wooden treads give rise to a striking contemporary look that immediately catches attention in any outdoor space, and this industrial-meets-natural combination works especially well for design-conscious homeowners who want their stairway to make a real statement.
You could need steel or aluminum frameworks, hardwood treads in materials like ipe or teak that resist rot and insects, and stainless steel hardware to prevent rust.
Start by pouring concrete footings at both the top and bottom to keep your metal framework stable and secure.
Pre-fabricated metal stringers are available online or through specialty retailers, which can simplify your build considerably, though custom metalwork from a welder gives you more control over the final look.
When installing wooden treads, attach them with stainless steel hardware and leave small gaps between slats so water drains properly and wood can expand and contract naturally.
If you're working with a metal fabricator, provide exact measurements and ask about adding drainage holes in horizontal surfaces to prevent water pooling.
Integrated LED lighting along the underside of treads or built into the metal framework adds a sophisticated finishing touch that makes the stairs functional at night.
This project typically runs between eight hundred and fifteen hundred dollars depending on your material selections and whether you need custom metalwork done.
Stairway Planters Transform Sloped Yards
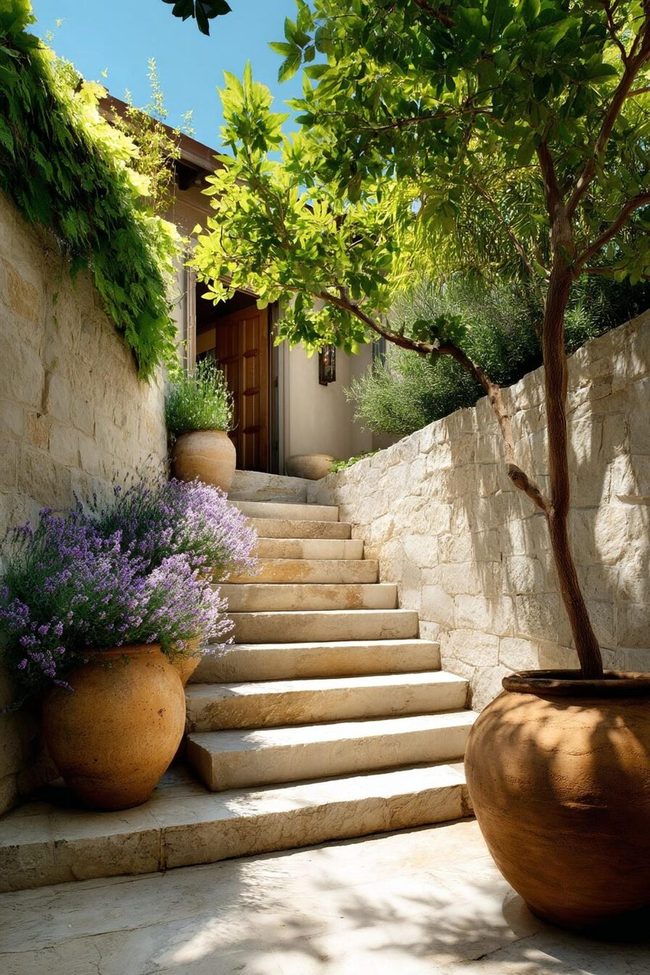
Waterfalls of greenery cascading down every level add the most striking visual element when you build terraced garden steps that blend planting beds directly into your slope design.
Stone or timber retaining walls define every horizontal platform, and plants spilling over the front edges soften the hard surfaces while drawing the eye downward through layers of foliage.
You could solve two problems at once, establishing safe access between different yard elevations and carving out perfect spots to display plants you love.
Start by sketching your stairway route and planning every step with at least 24 inches of depth to fit both comfortable footsteps and soil for growing things.
Pressure-treated timbers, concrete blocks, or natural stone work well for the retaining walls, and you could secure them with stakes, adhesive, or proper backfill depending on which material you choose.
Fill the horizontal sections with quality topsoil blended with compost so plants have everything they need to thrive, while reserving about 12 inches at the front of every step as your walking surface using flagstone, pavers, or decomposed granite to keep foot traffic clear.
Installing drip irrigation during construction means your integrated gardens stay hydrated without much fussing once everything is established.
Solar path lights along the walking areas or uplighting on specimen plants add both safety and nighttime appeal to your design.
Stainless Steel Cables Preserve Unobstructed Views
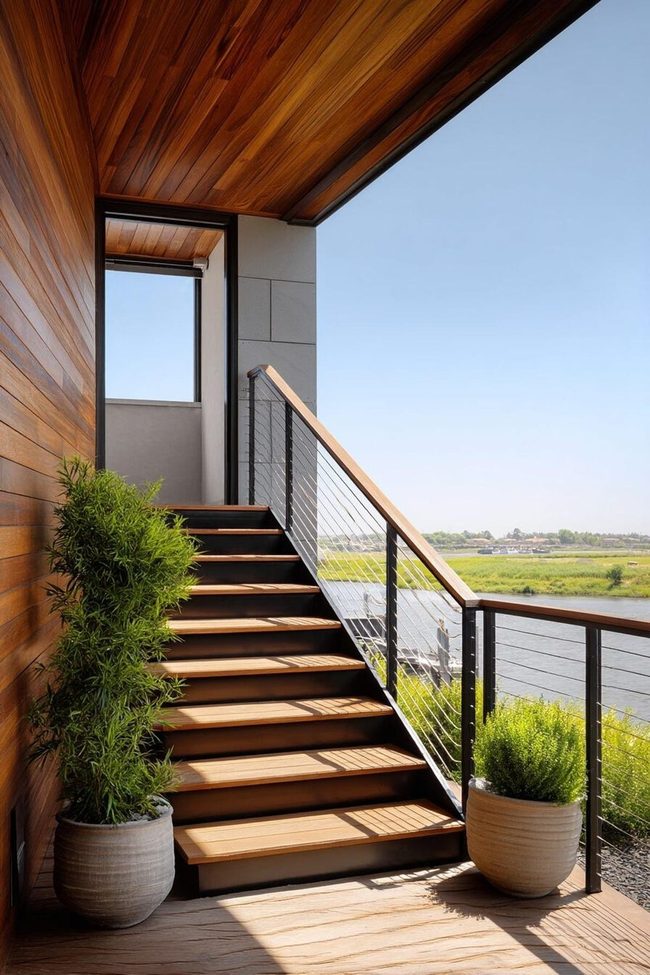
Cable rail stairs deliver an unobstructed view of your landscape while meeting all safety requirements, making them ideal if you overlook water, mountains, or other scenery worth preserving.
Horizontal stainless steel cables stretched between vertical posts combine with wooden or concrete steps to bring about a clean, modern look that won't block sightlines the way traditional railings do.
You are able to need cable rail hardware kits, metal posts, tensioning tools, and materials for your chosen stair treads to get started on this project.
Start by building your basic stair structure using concrete, wood, or composite materials according to local building codes, then position metal posts at required intervals with solid anchoring in concrete footings for safety.
Stainless steel posts resist weather best, though powder-coated aluminum gives you more color options to match your home's exterior.
Install horizontal cables through drilled posts or use special hardware made specifically for cable systems, keeping spacing at 4 inches or less to meet safety codes and prevent children from fitting through.
Proper cable tensioning matters, they need to be tight enough to prevent sagging but not so tight they damage the posts.
Beyond occasional tightening and cleaning, cable railings demand little maintenance and work especially well with floating treads or concrete slabs in contemporary designs.
Heavy Timber Stairway In Weathered Brown
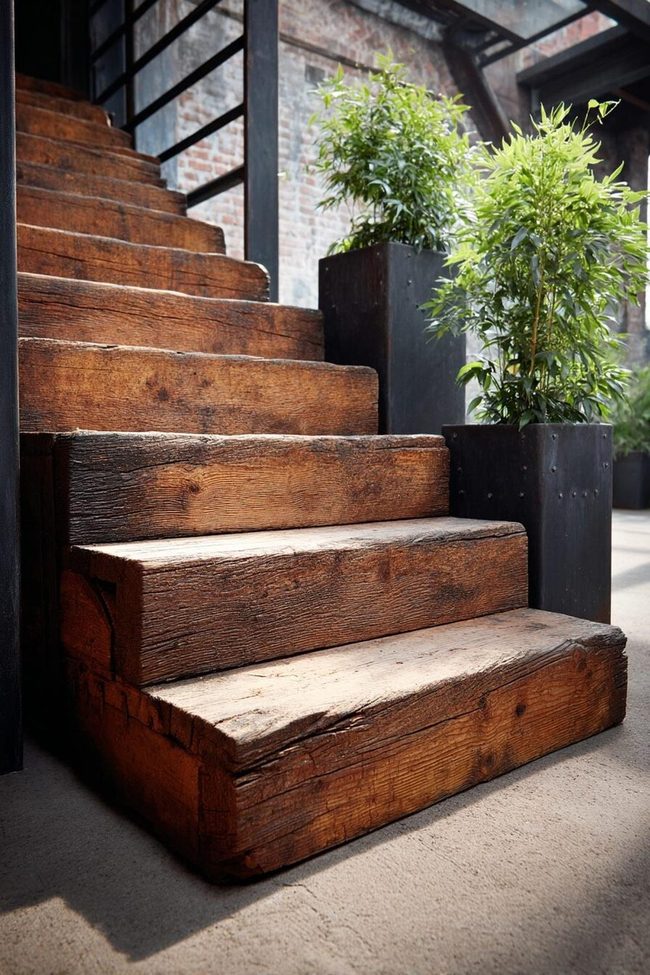
Railway tie stairs bring instant character to your landscape with their chunky proportions and weathered appearance that tells a story, and these robust wooden beams originally used to support railroad tracks shape sturdy, long-lasting steps that handle heavy traffic and severe weather conditions.
You may need actual railway ties or landscape timbers designed to mimic their appearance, along with gravel, rebar, and basic digging tools, though it's worth checking local regulations first since some areas restrict genuine railway ties due to creosote treatment.
New landscape timbers designed to look like railway ties offer the same aesthetic without potential environmental concerns and work just as well for this project.
Start by marking your stairway path and excavating enough soil to shape a solid base for across step, then lay a 4-inch base of compacted gravel beneath across timber to promote drainage and prevent rotting.
Position your first timber at the base of the slope, making sure it's level from side to side and slightly sloped from front to back for water runoff, then secure across timber by driving 24-inch rebar stakes through predrilled holes into the ground below.
Fill the tread area behind across timber with compacted gravel and top it with decomposed granite or pea gravel for a finished look, and for extra stability on longer runs, consider staggering two timbers side by side and securing them with landscape screws.
Stone And Cedar Stair Steps
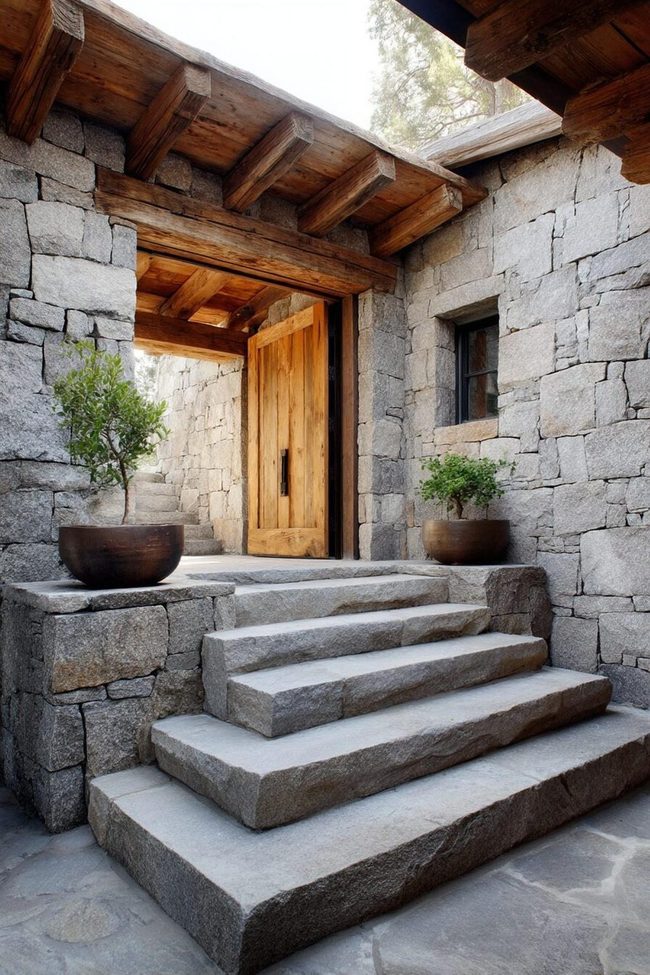
Combining rough stone risers with thick wooden treads creates outside stairs that blend seamlessly into any natural landscape, and nothing captures rustic charm quite like this timeless pairing of durable materials and warm textures.
You are able to want to start by selecting flat stones like flagstone or bluestone for the risers, then choose thick-cut cedar or redwood boards at least 2 inches thick for the treads to handle weight and prevent warping over time.
One advantage of this design is how forgiving it can be, slightly uneven stone heights work fine because you can adjust where the wooden treads sit, which makes the project manageable for people doing it themselves.
Begin by digging out your stair area and creating a solid, level base with compacted gravel and sand so nothing shifts or settles later.
Set your stone risers in place using construction adhesive and backfill with gravel for extra stability, then measure and cut your wooden treads to overhang the stones just slightly for better looks and functionality.
Secure in all wooden tread to the stone using masonry screws with predrilled holes so the wood won't split, and finish by applying multiple coats of exterior sealant to protect the wood and bring out its natural grain.
Reclaimed Pallet Rustic Timber Terrace Steps
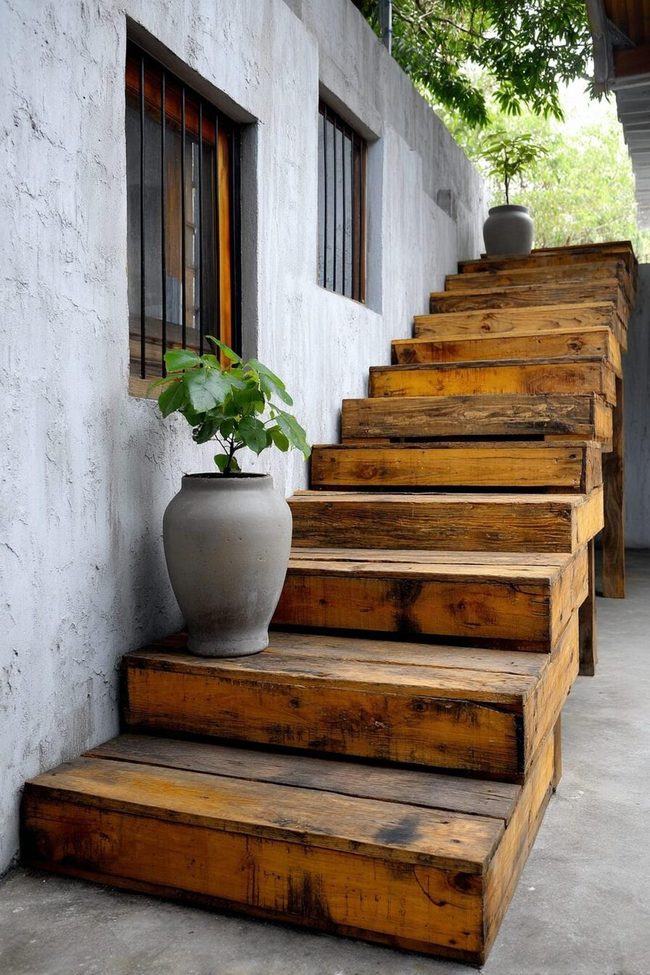
Pallet wood stairs showcase a weathered, textural appeal that looks refined in casual garden settings and elevates free or low-cost materials into functional outdoor steps while respecting both your wallet and the environment.
Small solar lights attached to the sides shape a welcoming glow for evening use without complex wiring and add dimension to your outdoor space.
Alternating different wood tones or arranging the pallet boards in herringbone patterns on the treads brings visual interest and personality to the design.
You will need several wooden pallets in good condition, pressure-treated lumber for structural support, concrete blocks, and basic carpentry tools to get started.
Begin by disassembling the pallets and removing nails, then select the best boards for your treads and risers.
Set concrete blocks into level gravel beds to shape a solid foundation that supports your wooden framework underneath.
Cut pressure-treated 2×12 lumber to build a simple stair frame with the desired rise and run for your steps.
Sand the pallet wood thoroughly to remove splinters while keeping the weathered character that gives this design its personality.
Attach the pallet boards to your frame using exterior-grade screws and choose either solid treads or slatted designs based on what you prefer.
Apply several coats of exterior-grade polyurethane or deck sealer to protect the wood from moisture and extend how long it lasts.
Gray Stone Steps Through Landscape Growth
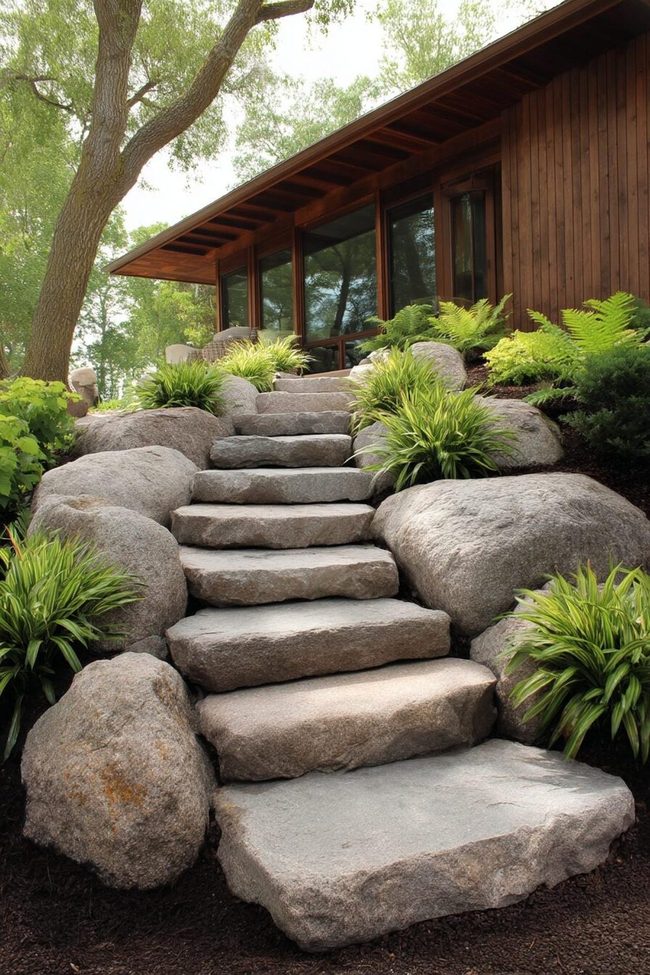
Boulder steps carved into your landscape bring about a striking natural stairway that looks like it sprouted from the earth itself, and they're one of the most impressive hardscaping features you can build.
Large, flat-topped stones stack into comfortable stepping platforms that blend seamlessly with surrounding plants and soil, making the whole structure appear effortless and organic.
You are able to need access to substantial stones, crushed gravel for the foundation, and basic landscaping tools to get started on this project.
Planning your route in a considered manner matters because you want both a safe path and one that follows your land's natural slopes and contours.
Start by mapping out where your steps will go, then excavate soil for in all stone and lay down about four inches of compacted crushed gravel to ensure good drainage and prevent the stones from sinking over time.
Across boulder should sit at least eighteen inches deep into the ground for solid footing and have a relatively level top surface for safe stepping.
Test in all stone for stability before you move ahead to position the next one, and space your steps to match a comfortable stride length while respecting your terrain's natural grade.
Once your stones are set, you can plant low-growing ground covers or creeping thyme in the gaps between them, and these plants soften the hard edges while anchoring the steps visually to the surrounding garden.
Led-Lit Concrete Stairway Design
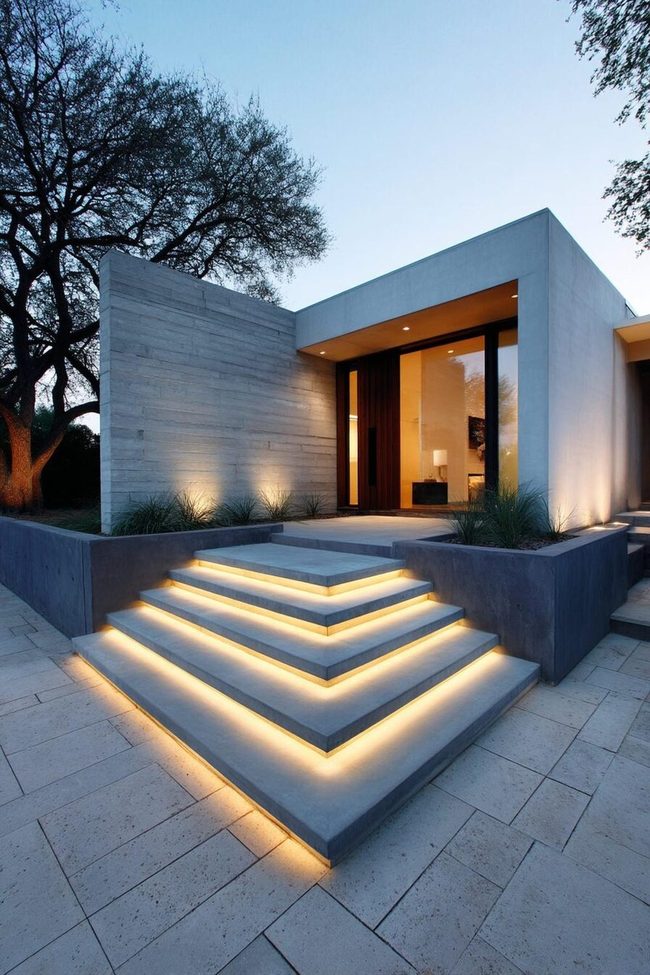
Illuminated concrete steps turn ordinary garden staircases into striking nighttime features that glow beautifully when darkness falls, combining industrial style with easy to maintain safety benefits.
You can want to gather concrete mix, forming materials, LED strip lights or path lights, and basic masonry tools to get started on this project.
Start by measuring and marking your stairway location in a considered manner, making sure throughout step has consistent rise and run for both safety and comfort.
Build sturdy forms using 2×4 lumber and plywood to shape your steps, and include conduit pathways for electrical wiring before you pour the concrete.
Recessed LED strips along step edges or small fixture pockets built into the sides of throughout step both work well for the lighting component.
Low-voltage lighting systems designed for garden use keep your installation safe and weather-resistant, and warm white lights give rise to a more appealing atmosphere than cool blue tones.
Solar-powered options skip the complex wiring but may not shine as consistently as hardwired systems do.
Concrete sealer protects your steps from staining and helps them last longer, and you can embed decorative elements like colored glass or interesting aggregates into the top layer for extra visual interest.
These illuminated steps perform especially well when they lead to entertainment areas or water features in your landscape, and the project typically costs between $600-1200 depending on your lighting system's complexity and the stairway's size.
Riley Summers
Co-Founder & Home Styling Expert
Expertise
Smart Space Planning & Layout Optimization, DIY Home Projects & Budget-Friendly Décor, Trend Forecasting & Sustainable Design, Practical Styling Solutions for Every Home
Education
New York School of Interior Design, New York, NY
Riley Summers knows that a well-designed home isn’t just about looks—it’s about function, comfort, and personality. As co-founder of [Brand Name], she specializes in smart space planning, trend-forward décor, and sustainable styling solutions.
With a background in interior architecture from NYSID, Riley helps homeowners maximize their spaces with clever layouts and easy DIY projects. She loves sharing budget-friendly decorating ideas that make high design accessible.
Outside of work, she enjoys strolling through NYC’s neighborhoods, discovering new design trends, and savoring a great cup of coffee.